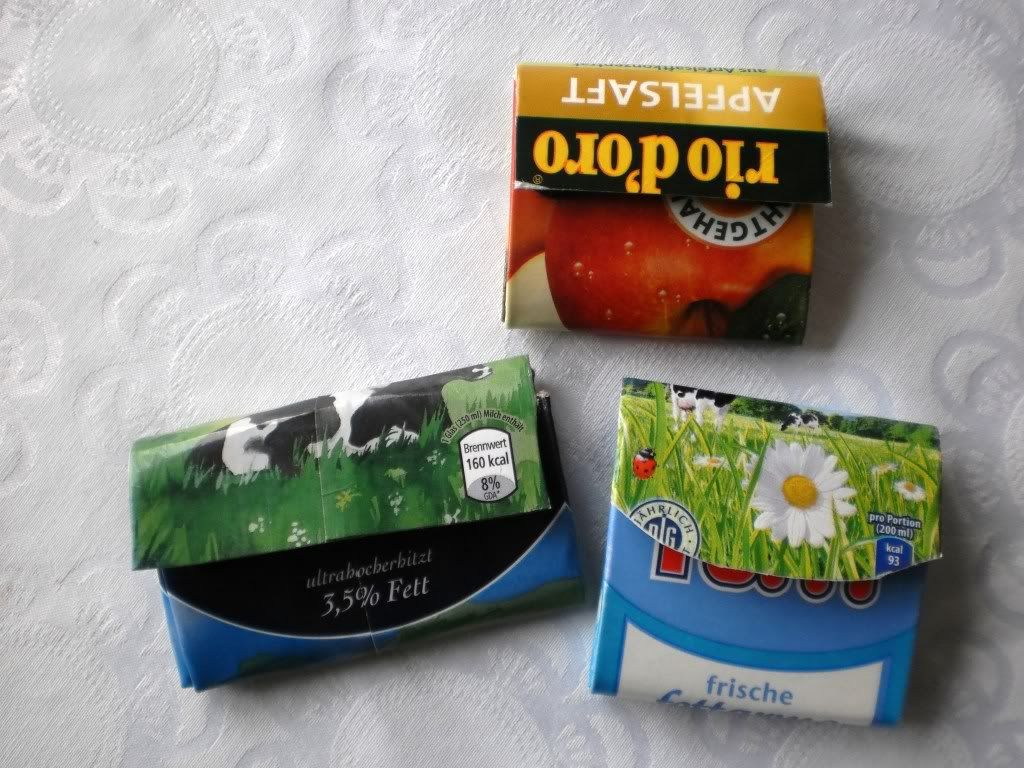
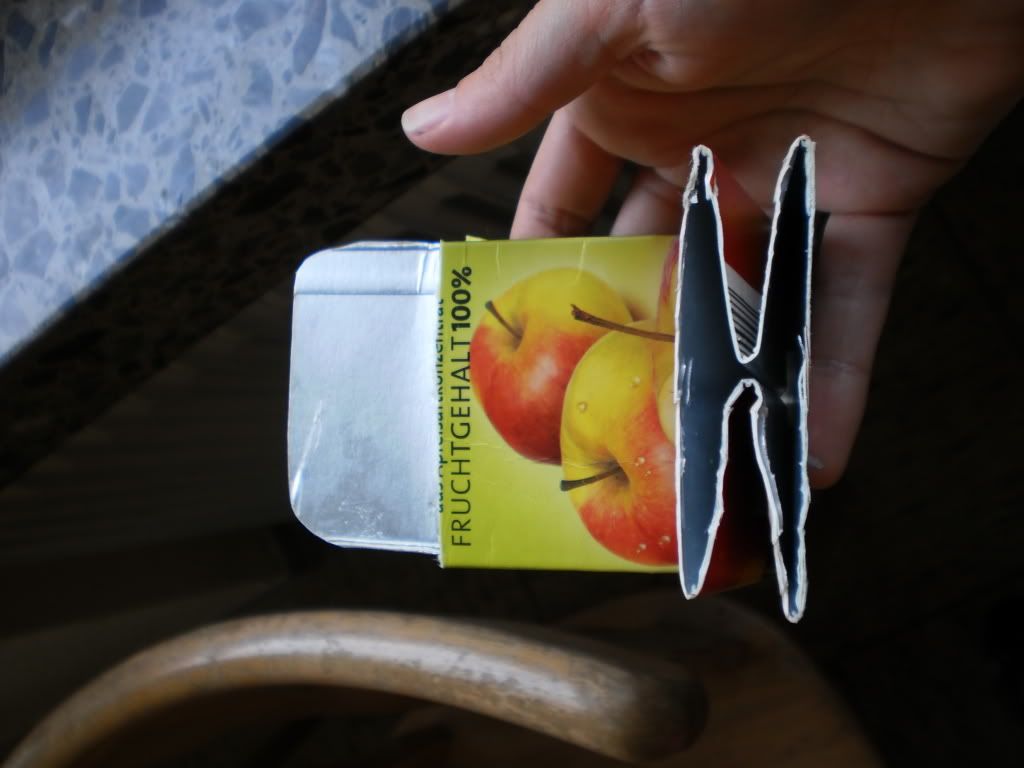
My kids always loose their wallets. And often need one, for all the garage sales and fun fairs and trips to the sweet store. Our new wallets now look like this:
And just so you know we can actually use them:
They are longlasting, small enough to fit into the pockets of little pants, cheap enough you don´t have to worry when they get lost, and they involve recycling - all together that makes them quite a cool project, don´t you think?
All you need is:
A hot glue gun
Some velcro strips or dots (self adhesive ones work the best)
and drink containers of any size, preferably with a beautiful design on them. (and love, of course. Sorry. I couldn´t keep that one in)
Now take your drink container, and cut off the top and the bottom:
Yeah, of course you could work a little more neat - but this was done by a seven year old, so I think it´s pretty cool :)
This is a good point to wash your container, if you haven´t done it allready. We worked with milk containers, actually, the wallets on the first pic were made in February, and I can guarantee you, it didn´t get stinky, because you can wash them pretty clean this way.
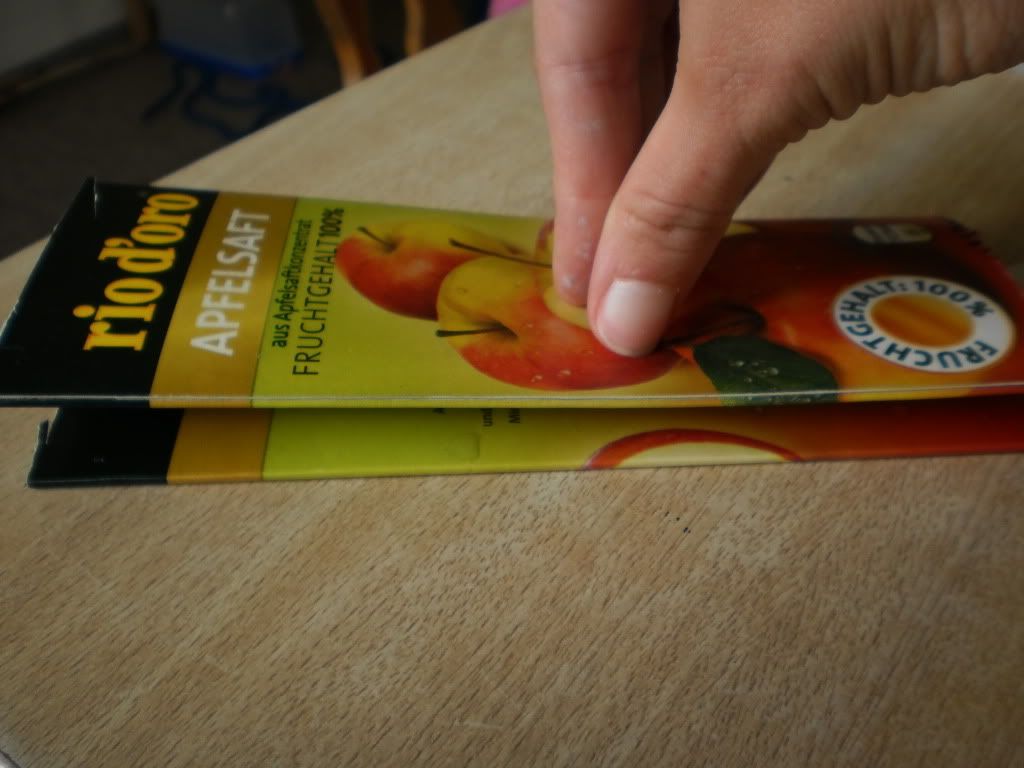
After this, flatten your container, with the boring looking sides with all the nutrition stats on tucked in, like this:
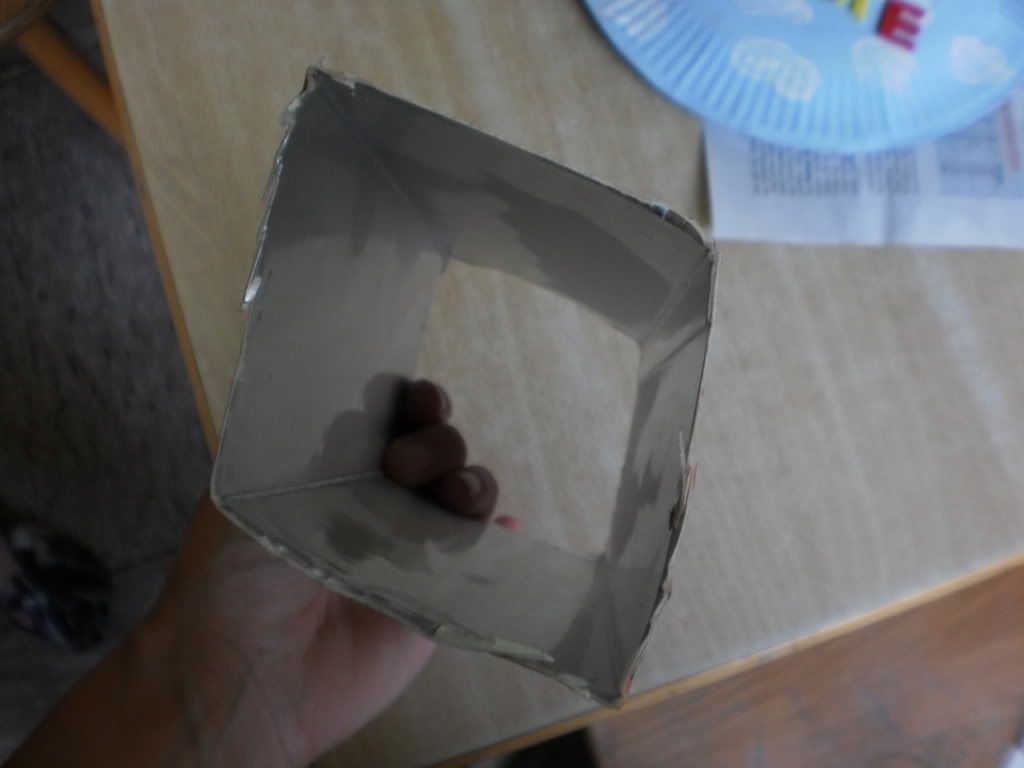
From the inside, it looks like this now:
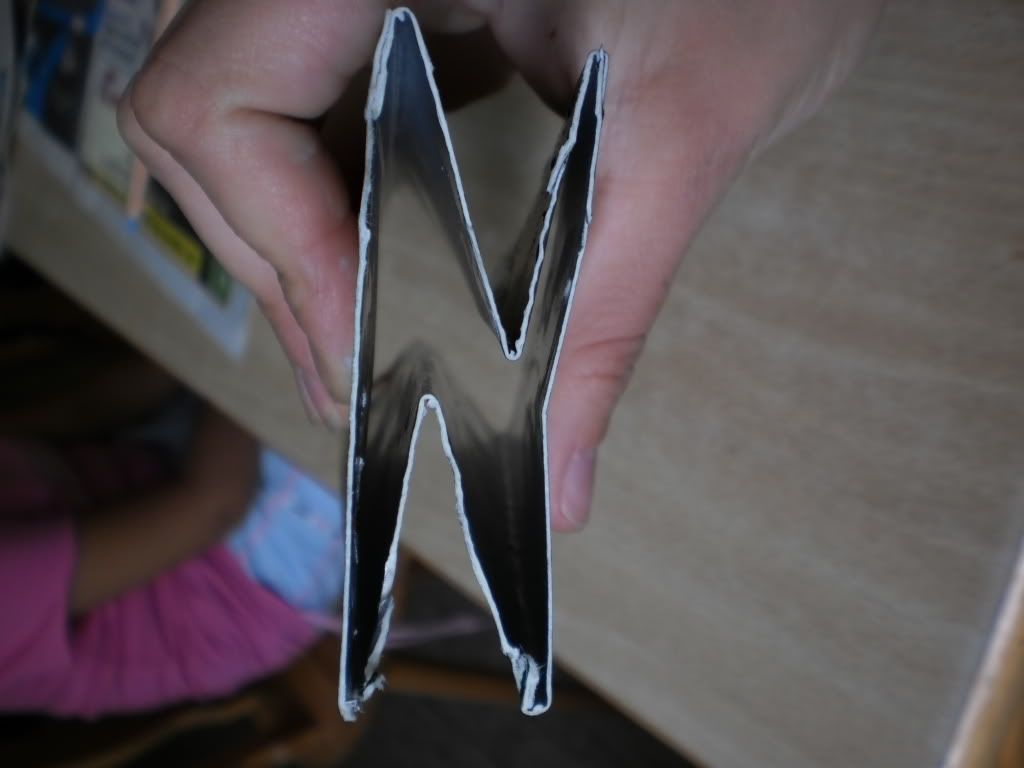
Then, by eyemeasure, fold the whole thing into three parts - one for the back, one for the front, and one for the flap.
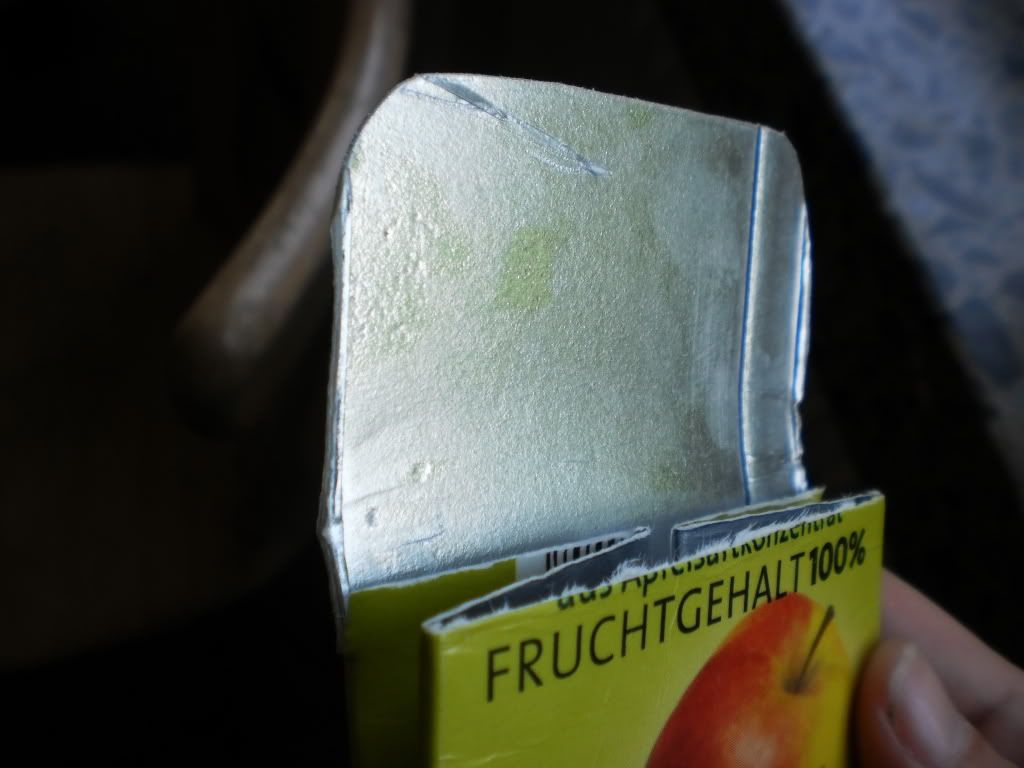
On this pic, you can see the version where we allready had cut the flap - simply cut of everything from the last third that isn´t supposed to become the flap - does this make sense? I´m not sure ;) Basically, you leave the back from the container intact, but cut off the rest. During this process, I like to round the edges, but that´s optional. Whatever floats your boat.
Now it´s time for your best friend, the hot glue gun. Put glue on the pat you can see in the pic above, the one with the apples on, and glue the front to the back. Hold it for a while, to let it cool down and connect.
And with this, ladies and gentlemen, we´re almost there - add your velcro to the front and to the flap, and go out with your shiny new wallet. Show it to everybody and tell them how cool recycling is :)
So, this was my craft project for the week. I´m typing this at home, on my Sofa, on a rainy tuesday, but I´m telling blogger to publish it on Saturday. So if you read this, I´m in Paris. I´ve never done this before, writing posts in advance and publishing them at some point later. Usually it´s write and hit over here, so, that´s an experiment for me :)
My music for the day is:
Yep, I admit it. I´ve got a crush on this girl. Her rapping is so confident and effortless, and the fun she´s having with her music is contagious. Besides, she´s a true style icon for me, as well :)
I still wanted to show off yesterday´s afternoon activity. Do you know the website Toy-a-day ?
I hope you do. In case you don´t, go there now. They provide tons of little paper people all following the same, basic pattern, which gives them a special charme. For free, by the way. So, if you run out of ideas what to do inside, just print a couple of your kids favourite characters out, grab scissors and glue and get to work :)
We started with the Simpsons. They also have Albert Einstein and Stephen Hawkins and Steve Jobs and Batman and Frida Kahlo. But we chose the Simpsons. My husband and I practically grew up with them. We don´t have a television, but we´re all for selective entertainment, and for sure we´ve got most of the seasons on DVD. My daughters love them. They didn´t have Maggie, however, so Ronja just copied the template by holding it against the window, and came up with her own Maggie-version:
Later I figured they also offer a blank template, but I must admit I like it even more this way. She even made herself, later, but I missed taking a photo of the little paper Ronja, as I was busy helping glueing and fumbling little paper arms through body pieces.
Ha! There we are, messing around in the kitchen. We ended up making about 20 little paper people...
When you look closely at my blurry, strangely lightened picture, you might see the guys from the "Wild things", Bob the Builder, a little owl (of course), and two Coralines. In case you don´t know who Coraline is, you can find that out here.
We would have loved to make some Harry Potter characters, but yesterday, we simply ran out of time, and they had no template. But there are many rainy afternoons to come, so the sky is the limit :) And actually, one awesome fellow blogger allready made some.
So, all I have for my bookshelf so far is...
... William Shakespeare. I hope he wouldn´t mind. Because I´m really thankfull for his sonnets.
And guess what? All the mess was cleaned up - perfectly cleaned up - three minutes later. I set a timer and told them, if they´d manage to pick up even the tiniest scrap, they´d be allowed to watch one episode of the Simpsons :)
No music for today, but I´ll be back tomorrow, anyway :)
Want to surprise all those aunts and sisters and grandmas and teachers with something handmade that they can actually use? Want to show your kids about the chemical reaction of natron and citric aid, dissolved in water? Then join me making some cosmetics:
We made bathfizzies, bathsalt, lipgloss and soap, but let´s just start with the bath fizzies. One thing I loved last year, when I regained a little freedom after my twins grew older, was soaking in the tub, for long evenings, with a book. I´ve always loved floating, but then again, who doesn´t? And I´ve always loved those luxury bath fizzies, smelling like some essential oils and coloring the bathwater. Only, they are pretty pricey, and even now, as I could afford them, why buy when you can diy? (Love this saying!)
So, I went researching the internet, raided a pharmacy and went to work. Also, this is an awesome chemical experiment to show to your children, so, gather your ingredients:
You will need:
2 cups of natron
1cup of citric aid (not liquid. We got it in the pharmacy)
1/4 cup of cornstarch
1/2 cup of cocoabutter (from the pharmacy, too)
This is the base. You can add fragrances or color in form of foodcoloring (not liquid), as much as you want to.
Then you first mix the dry ingredients (Natron, citric aid and cornstarch) in a bowl:
while you melt the cocoa butter in a double boiler:
pour the cocoa butter into the bowl with your dry ingredients, add essential oils and foodcoloring and mix with hands.
It will feel like wet sand, and just like with wet sand on the beach, you now form balls with your hands, such as these:
You need to let them dry for 24 hours, then they become pretty hard, so you can wrap them in little boxes or cellophane or jars, without them breaking. When you throw them into water, they dissolve, and the natron reacts with the citric aid, causing your water to sputter. We tried it with the rests from our bowl right away, and it worked:
Should have taken a smelling and sounding picture, though :) Martha Stewart offers a similar recipe, only she moulds her fizzies in icecube trays and adds cane sugar, which sounds intresting, as well. Check her recipe out here.
We still had some cocoa butter spare, so we used it to make lipbalm. We got very cheap containers from the pharmacy:
They were five cent each, and the only small containers we could find, so we had to spice them up a bit, by spraypainting the lids:
Then we simply chopped some lipstick rests into the doubleboiler:
Then we melted those lipstick rests together with the cocoabutter, and if you have, some beeswax. We had, from our candle project, but be carefull using not too much beeswax, or your lipbalm will get too hard. Pour the mixture into your containers, and voila - you´ve got homemade lipbalm.
And as for the bath salt - we simply bought plain salt crystals and mixed them with petals, essential oils, or the contents of teabags like peppermint or christmas spice. Oh, and we added foodcoloring. And glitter. We love foodcoloring and glitter. Then we filled this in jars and photoshopped some nice labels:
The girls wrote the texts themselves and photoshopped with my assistance. So, what have we got:
- A personalized cosmetics package for lots of female friends and relatives
-Children learning about homogenization, chemical reactions, photoshop and an attitude not to buy everything and
- an afternoon of fun in the kitchen! Cool, huh?
So, this was the first of my handmade christmas posts. There will be more to come, and I thought I´d match them with... well... a nice wintersong, okay? Such as this warm and cozy song, that sounds like floating in hot water, too:
Like these?I mean, it´s far too warm to wear them right now, but it´s never too early to start thinking about christmas presents, right? These are made combining wetfelting and needlefelting, so let´s first focus on the wetfelting-part and gather our supplies for this:Wool. Only black and red, for these, of course. Well, colors you like. I bought mine here, I don´t think they´ll ship internationally, but I bet you´ll find a way to get some nice, soft, unspun wool for felting. I bought several colors, because I want to make tons of cuffs. For everyone. But let´s go on:You´ll also need warm (or hot) water, soap (olive soap is very good, but I think any will do), something to quicken the fulling process like bubblewrap, or a bamboomat, or a towel, an area that can get wet and this black plastic strip you see on the left of the pic. That´s for shaping both cuffs, and I cut it from an old placemat. The size is a little bigger than both your cuffs should be. Any plastic that´s thick enough will do, but don´t take cardboard, it will soak. So, no you take your wool and layer it on your plasticstrip: See, on the left and right side, it needs to verlap a little. I tried to describe the process of how to tear the wool in this post, and now you simply take those "feathers" and layer them, until one side of your strip is fully covered. Looks like a friendly, fluffy dog, right?Now gently sprinkle everything with warm water. Felting is all about being gentle, if you work too fast, you´ll get holes and clumps. Take your soap, and like washing your hands, make lots of bubbles. Then, still very gently, process caressing your wool, only with your fingertips, until you feel that the surface solidifies. Is that a proper word? Well, it should look something like this: Take it, with the plastic strip still in place, and flip it around. Fold the overlapping, wet wool on your strip, cover the whole thing with wool, like you did before, and repeat the last steps on this side. It doesn´t matter if it looks a little uneven, like this: Because wool is a natural product, and it´s supposed to behave a little strange. Just proceed felting, until you get the feeling everything is in place and the wool won´t shift when you move your piece. Make sure you also felt the sides. When everything feels fine, remove the plastic strip, and place your work on a towel: Wrap it, make it nice and cozy:Pour hot water on it. Make it very, very soapy. Roll it, knead it like dough, flip it, until you can feel the muscles of your arms. Sweat. Any spare agressions? Put ém here. We´re done with the gentle. Your piece will tighten and shrink during this process, how much depends on a) how long you work and b) the characteristics of your wool. Felting is a lot about trial and error, that´s why I like it. Open your towel and try wearing your piece: This still looks a little loose, so I worked a little more until I was satisfied. Then rinse it and wring it out,cut it in half like this, trim the edgesand wear :-) This was probably the longest tutorial I ever put up here, so, I split it up. I explain the needlefelting here. And in case you´d like to see how they can look in violet, click here. I hope I´m still in time to link this to my favourite linklist, . And as this was such a long tutorial, I´m glad my favourite song today is a long song, too, so I don´t have to push F5 too often:I admit it´s a little corny. But hey, I like corny.
So, my fellow ladies, I do indeed appreciate contact, feel free to leave me a comment below. Hugs, Helen