
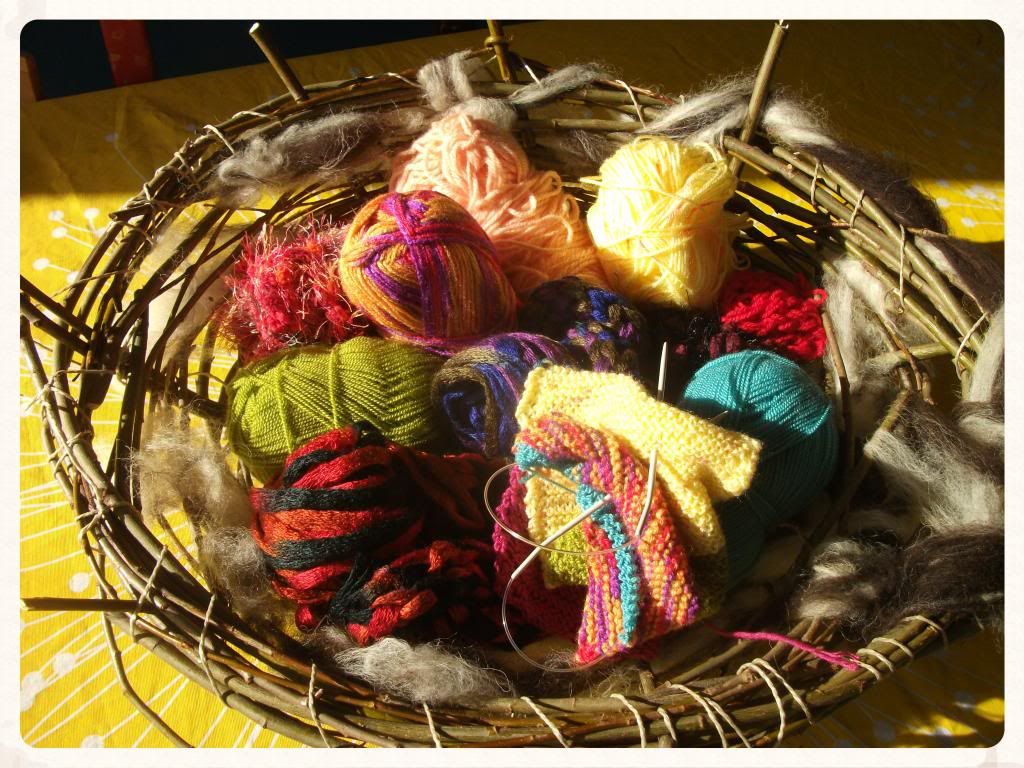
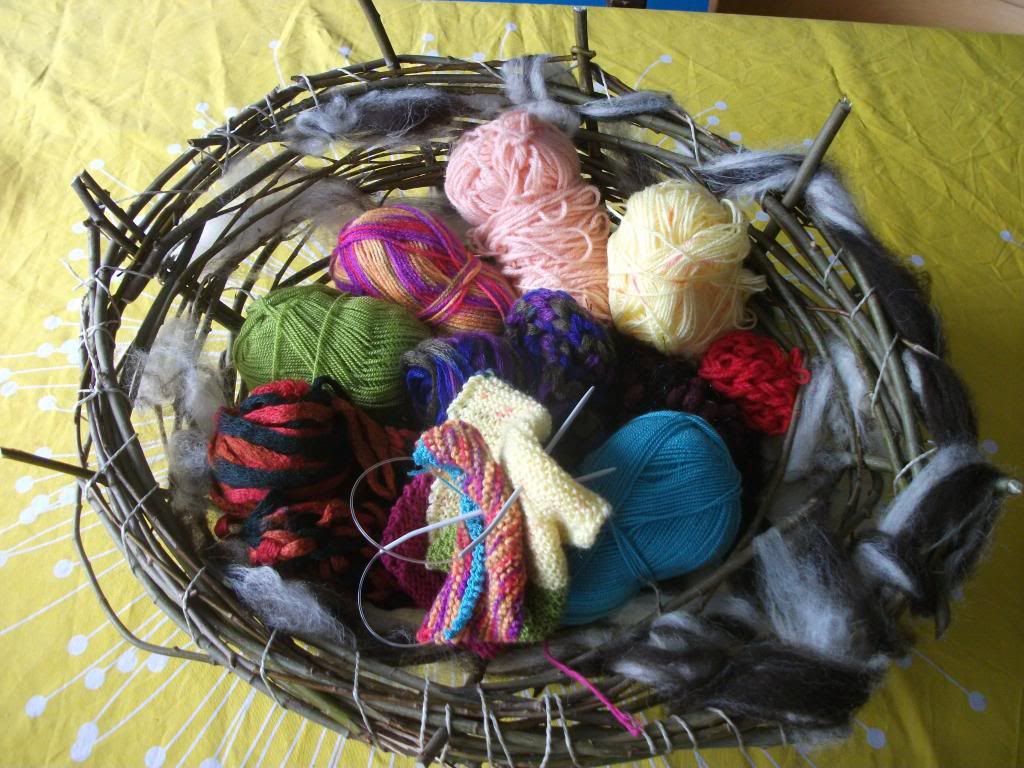
Look, my new knitting basket:
Aaaand.... it started out like this:

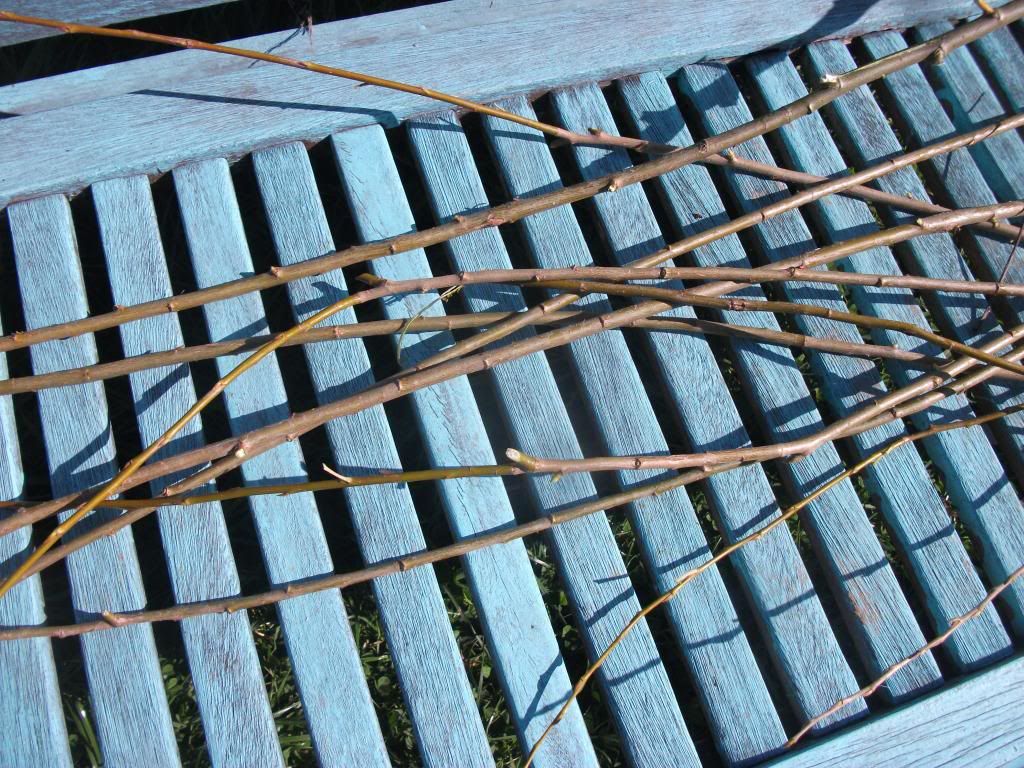
So, first you need to find some willows.
We´ve got this willow tipi in our garden. Meaning, 3 years ago, we stuck around 20 willows into the ground and let them grow. Oh, and they do grow, like mad. So, it was time to chop a bit off.

Don´t fear, if it isn´t freezing yet, you won´t do much harm.
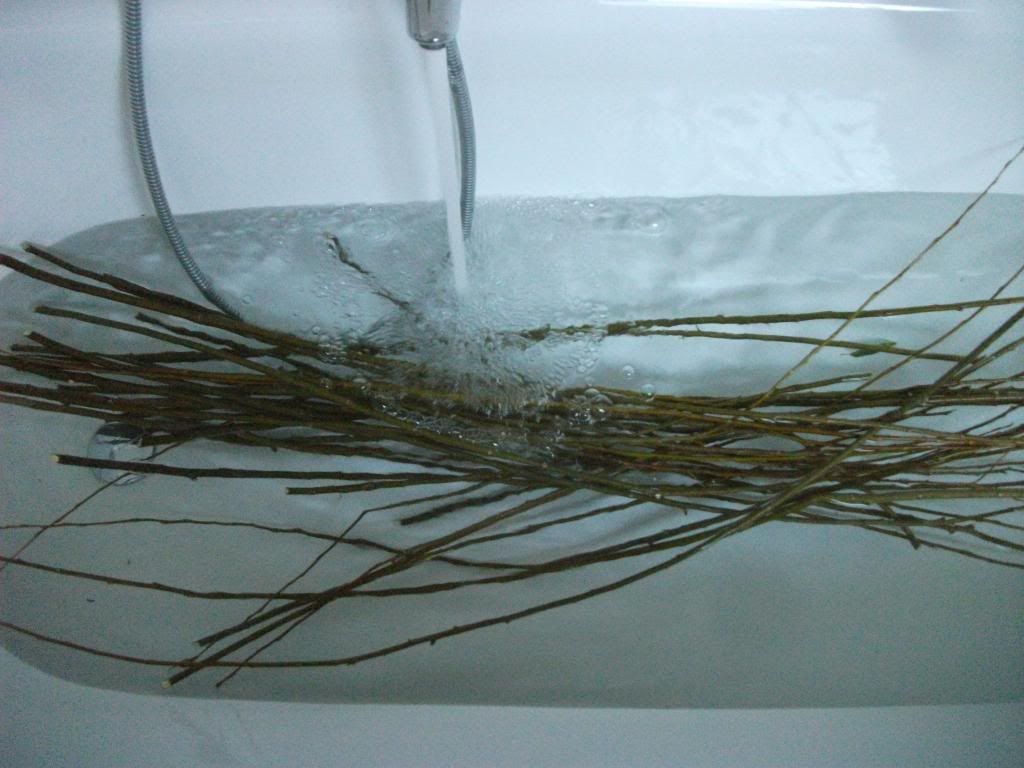
Then I gave the choppings to my kids, and asked them to rid them off all the leaves, until it looked like this:
I was eager to start weaving, but I had to wait - to make your willows more flexible, you´ve got to water them first. So I carried my willows up into our bathtub.
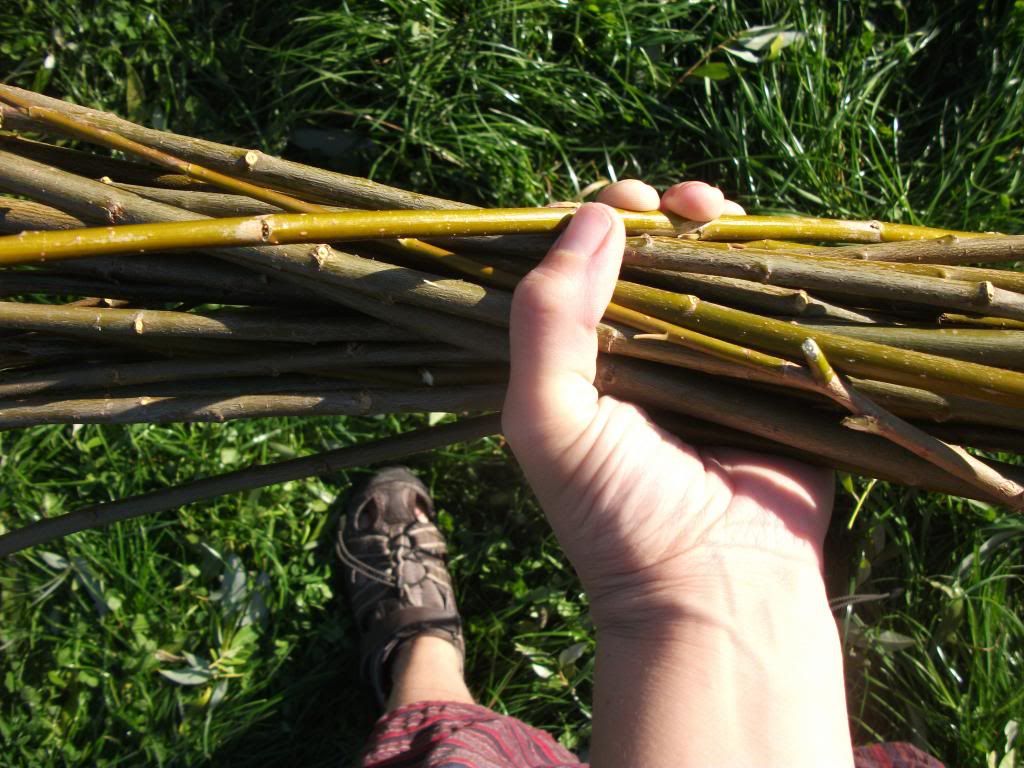
Then, the next day, I took my bundle outside, into the sun, and began.
You begin by picking some of the stronger willows for your frame, or base. Then you cross them, and form something like a star, like this:
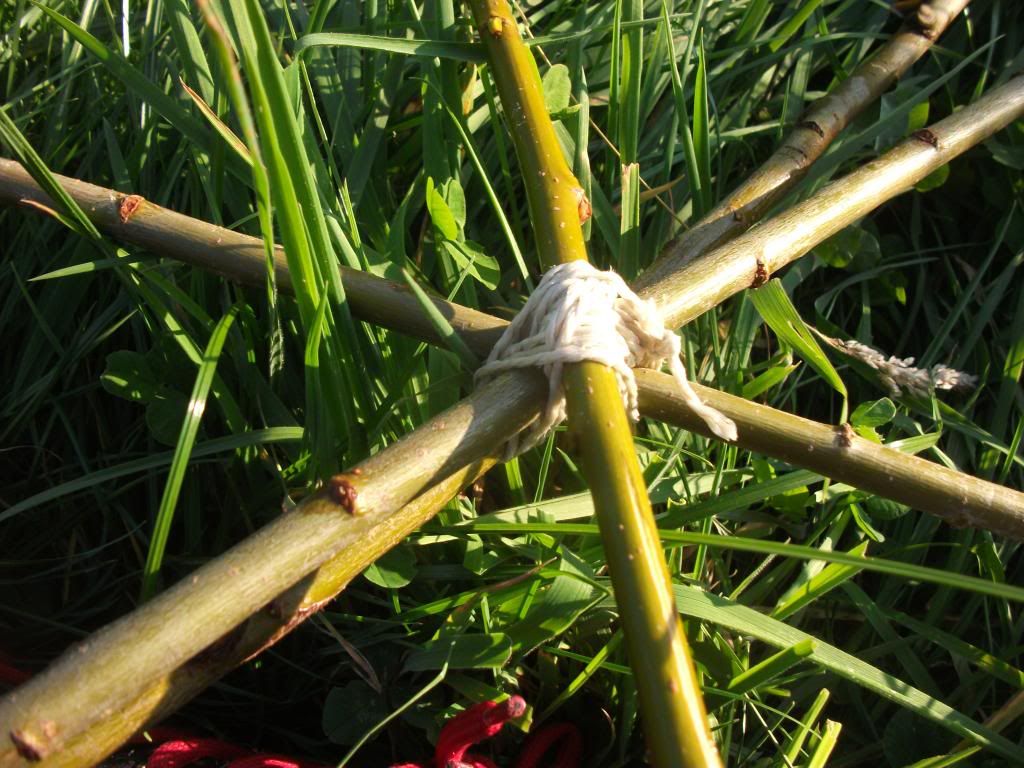
Now, the really important thing is to have an odd number of framewillows. This is because later you will be weaving- over and under, under and over - and you don´t want to weave "over" at the same spot as the previous round.
Only, when you cross the willows, you naturally always get an even number. So what you do is, you tie two together. That´s it. The willows are soft, after their long bath, so you can split the two other ends at the middle and come up with something like a 7-pointed star. Of course, you could also make a 9 pointed one. I think I´ll do that next time.
However, you then start weaving, round and round.

When you reach a circumfence you find satisfying, you simply bend up the frame rods. Comme ca:
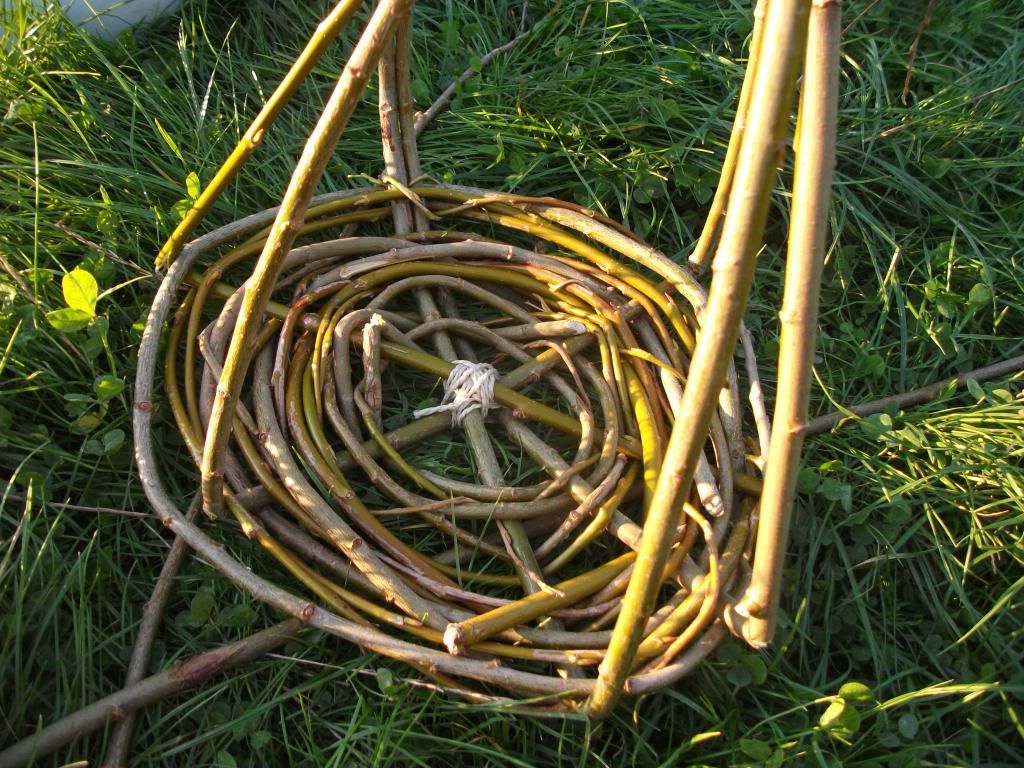
I tied them together at the top and called it a day - first, because my hands hurt, and second because I felt like it would be a great idea to let the frame rods dry in this upwards position, so they wouldn´t flip back as soon as I untied that knot at the top.
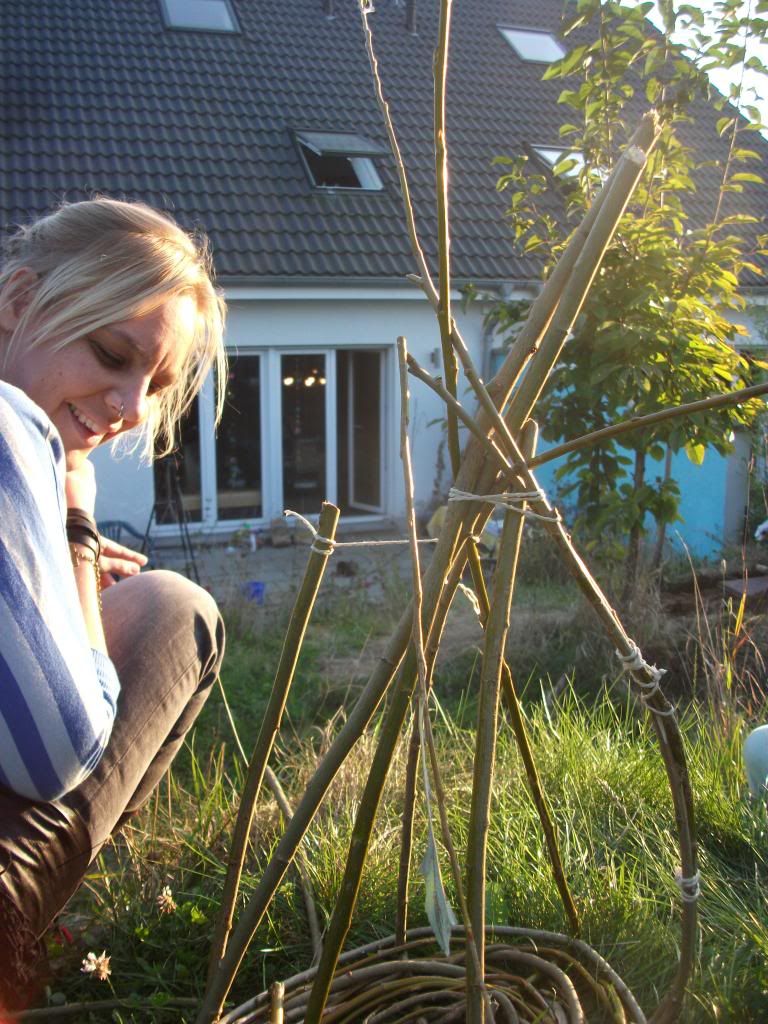
The following days, I continued weaving. In fact, I kept some willows in the tub for a whole week, and everytime I was in the bathroom, I weaved some in.
Well, and that was almost it.
When I had reached a height I liked, I took my loppers and snipped off the rest of the frame. I took some thread, to secure some loose ends - I figure that with more skilled weaving, this is not necessary, but since this was my first basket, well, it was.
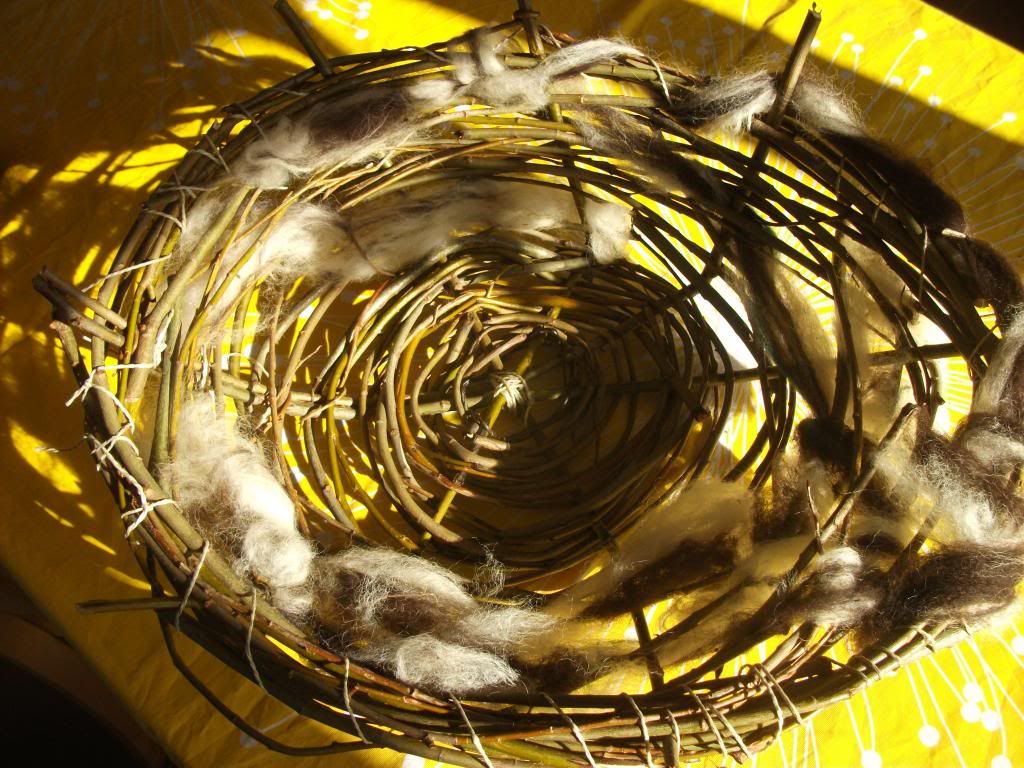
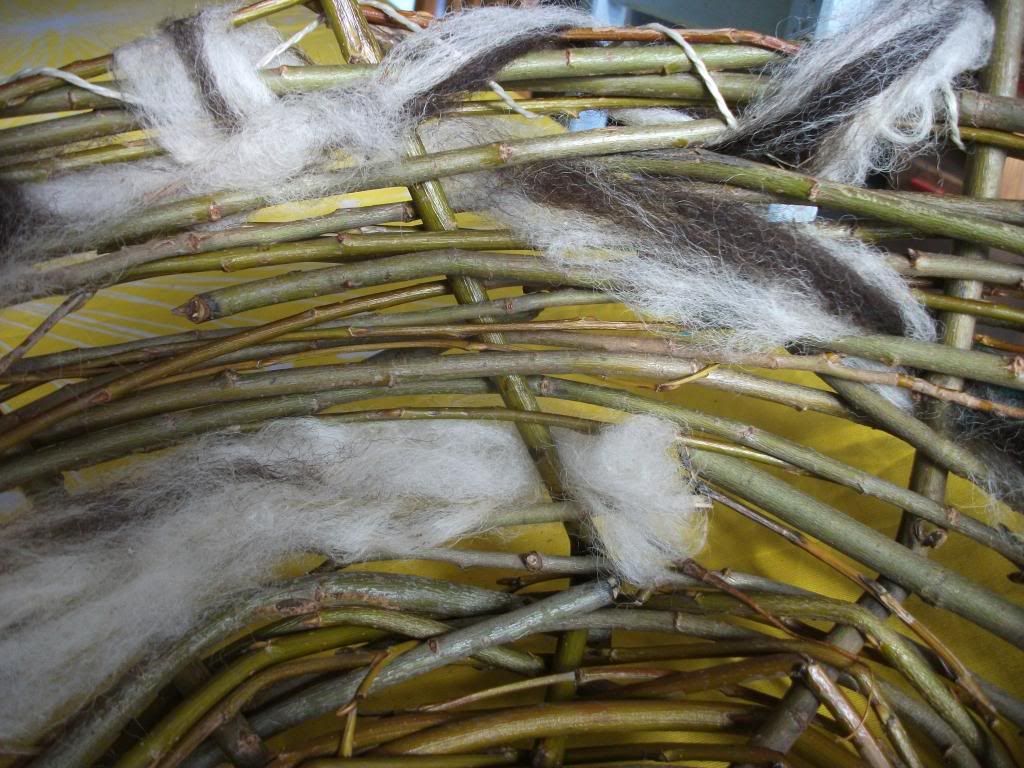
And because I found I still had some huge holes in my basket, but I finally wanted to use our bathtub again, I decided, since this was becomming a knitting basket anyway, that I wanted to fill those holes by weaving wool in.
I still had some unspun wool lying around - Eva combed them, so I weaved the strands in.
And although I have to admit that I can still work on my skills in basket-making, I love the result. I love the musty, earthy look of it, and I love how it serves to neatly collect all the wool that´s been lying around from our various knitting projects.
Also, I loved making it, from resources that grew in our garden, by myself.
So, here it is, one more time:
And with this, dear reader, I´m off to our official fall break! One week without school, one week to finish projects and start new ones, to cook aplle jam and make plum juice and sew and prepare our annual Halloween Party. I´ll keep you updated :)
For music, let´s go with something earthy, musty, too - and what´s more earthy than...
...Miley Cyrus? Isn´t she gorgeus in this video? Why can´t she produce more music like this?
5 comments:
I love your rustic willow basket. Its imperfections are what make it so nice.
Fabulous project, and great to see you on craft schooling sunday!
sooo nice!
nike air vapormax
christian louboutin shoes
huarache shoes
moncler jackets
air max
adidas nmd
adidas yeezy
lebron james shoes
nike air max shoes
moncler outlet
palm angels outlet
off white hoodie
yeezy shoes
bape
fear of god clothing
a bathing ape
kyrie irving shoes
goyard bag
off white clothing
golden goose sneakers
Post a Comment